Designing a Solenoid Stand
An important element to the overall functionality of the system is a stand to hold the solenoid and other times above the pool of liquid. It needs to be able to hold up the weight of the solenoid, the bottle of liquid, and support the wires going from the solenoid back to the controller.
Another important feature is the need for there to be nothing underneath or behind the solenoid. There needs to be a clear path for the water drops to fall, and ideally nothing behind them so you can place a backdrop.
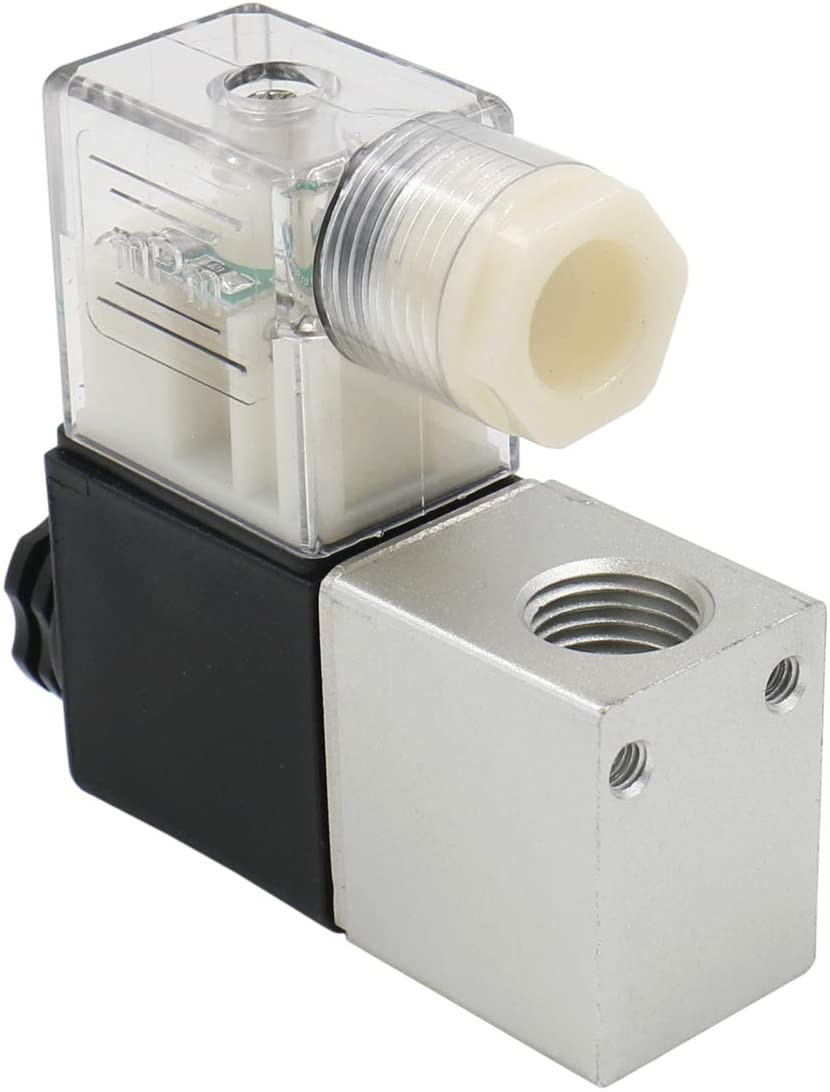
To begin, I focused on a bracket for the solenoid I have on hand: a cheap Heschen 12V 1/4 inch NPT.
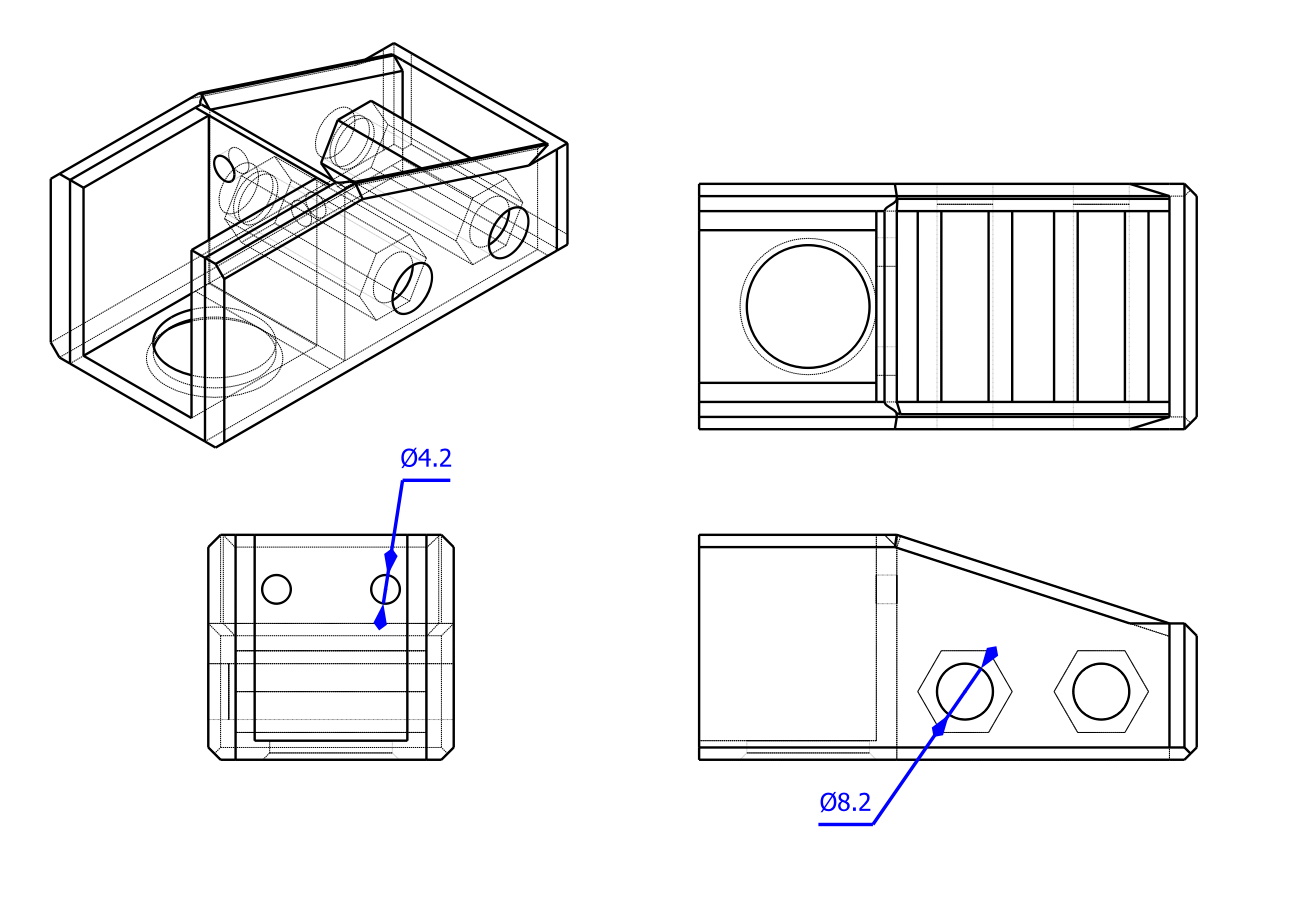
The large aluminum block has two M4 threaded mounting holes located on the bottom face. They are spaced 15 mm apart, and the block has a width of 22 mm wide and height of 30 mm.
Note: You can change the orientation of the DIN 43650 connector by unscrewing the retaining bolt and rotating the block. This will help clear the inlet port. The above orientation just helps with making the overall size smaller for packaging.
Building a Bracket
To hold up the solenoid, I designed a simple bracket that supports the aluminum block from the sides and underneath. The bracket has two holes M8 sized holes in the rear to attach two M8 threaded rods.
The goal is to use the threaded rods as a way of offsetting the solenoid away from the light stand.
Adding a Water Bottle
What’s water drop photography without a way to hold water?
I wanted a way to attach a recyled plastic beverage bottle to the solenoid, hoping to add some re-use to your recylabes. The good news is that almost all beverage bottles out there use an international standard for their threads.
In order to attach a plastic bottle, we need to adapt the threads on the cap to the 1/4 inch NPT threads on the solenoid valve.
ISBT PCO 1881
The fine folks over at the International Society of Beverage Technologies have put together a drawing for the standard plastic beverage bottle threads.
Open the Drawing pdf in new tab
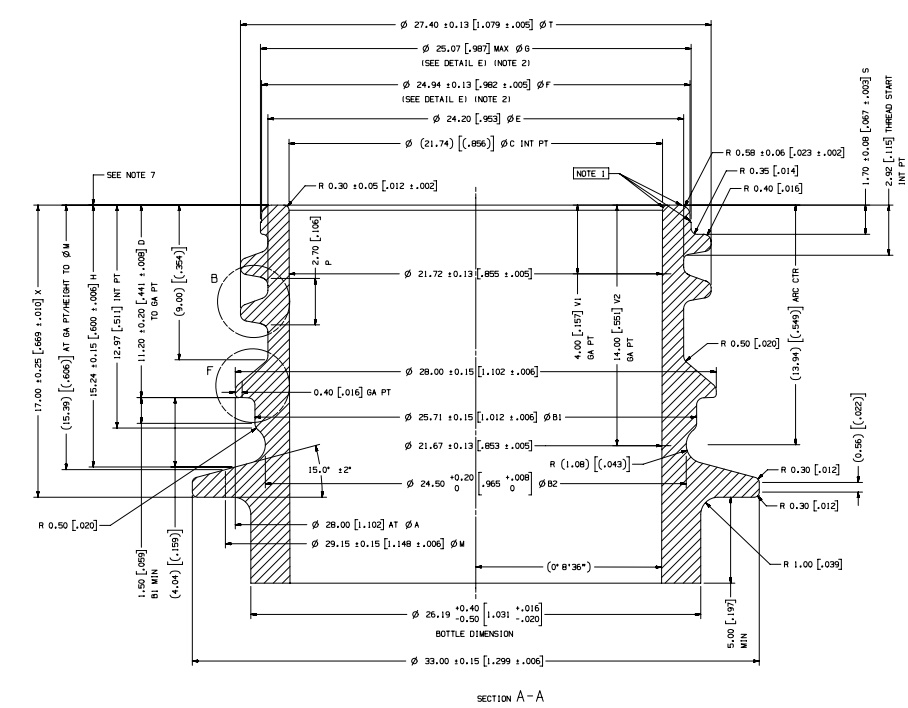
However, this is a drawing of the male threads, and we need an adapter that has the female threads.
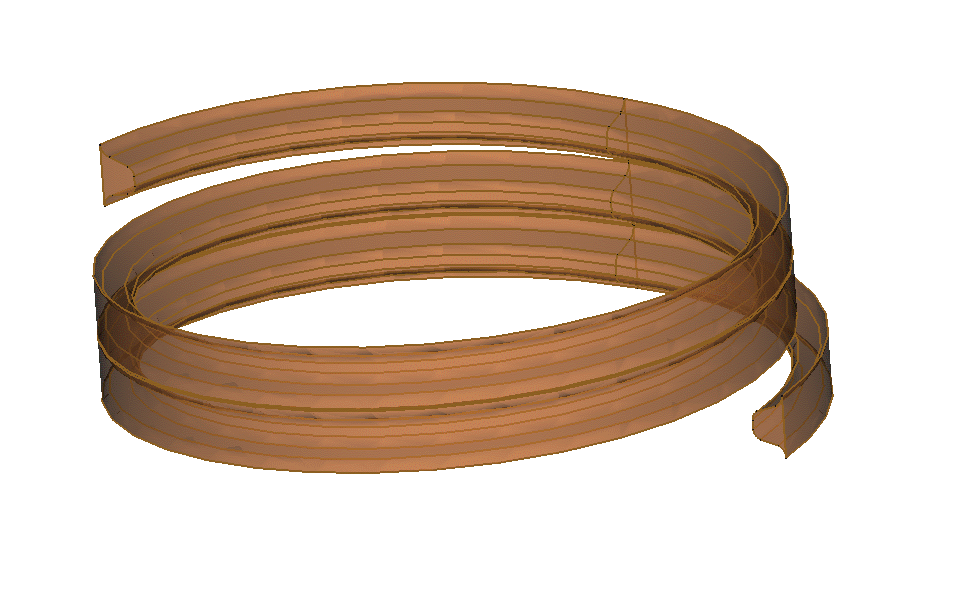
In order to create the threads, I used 3 helical paths in FreeCAD, and swept a profile matching the thread profile minus 0.1-0.2 mm for some clearance.
The three helixes are so that we can taper the beginning and end of the thread. By seperating the 3 helixes into the first 0.25 turn, 2 turns, and the final 0.25 turns, we can angle the two ends by 70° giving a nice taper that dissapears into the rest of the outside wall material.
From there I just added the rest of the material, and included a feature to try and seal between the interior of the bottle and the walls.
I also added the 1/4 inch NPT threads to the interior hole, so that the adapter can be printed right side up, and a additional coupler can be printed to attach the adapter to the valve block.
I referenced the wikipedia page for National Pipe Thread (NPT) specifics. One tricky part is that the threads angle inwards to create a tighter seal. Again, an angled helix comes in handy for creating these complex features.
A cross section view of the adapter helps to show these features:

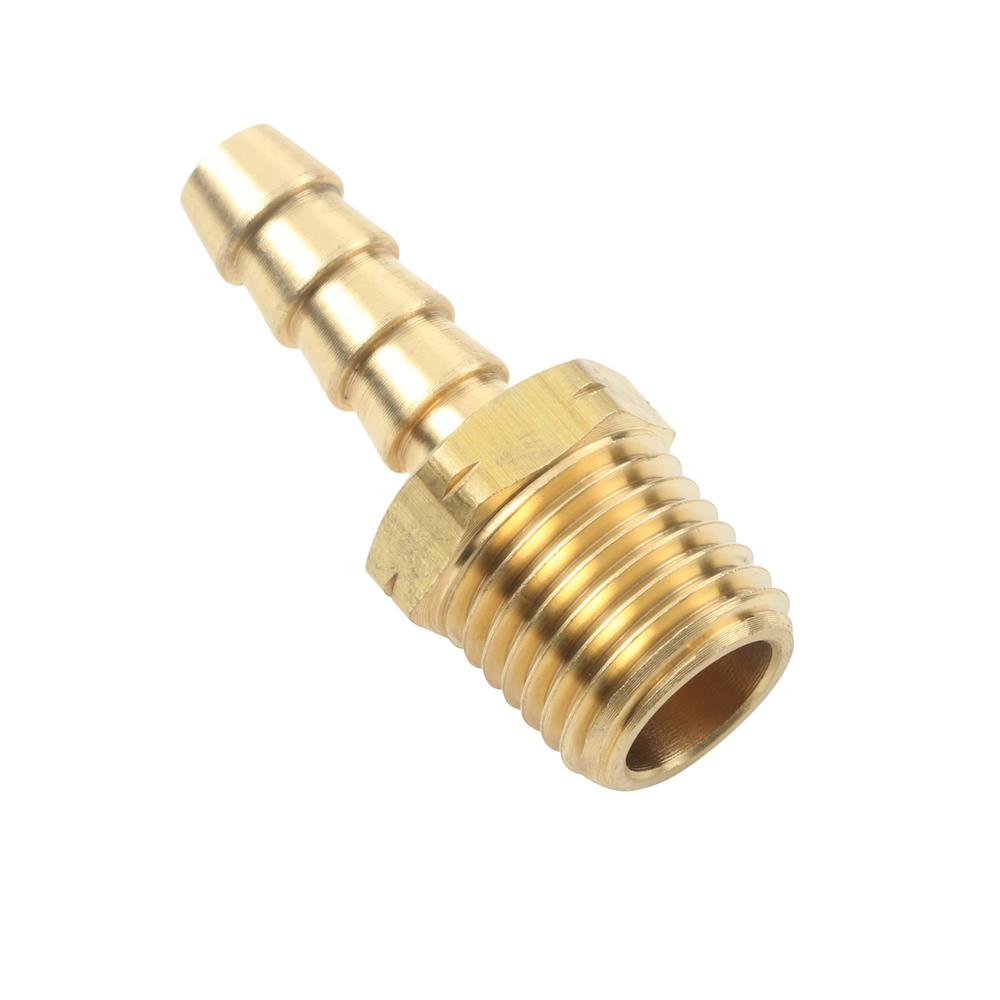
Adding a Nozzle
To add a nozzle to the outlet port, just use a 1/4 inch NPT hose barb. These can be purchased online and some hardware stores, or a 3D printable version can be found.
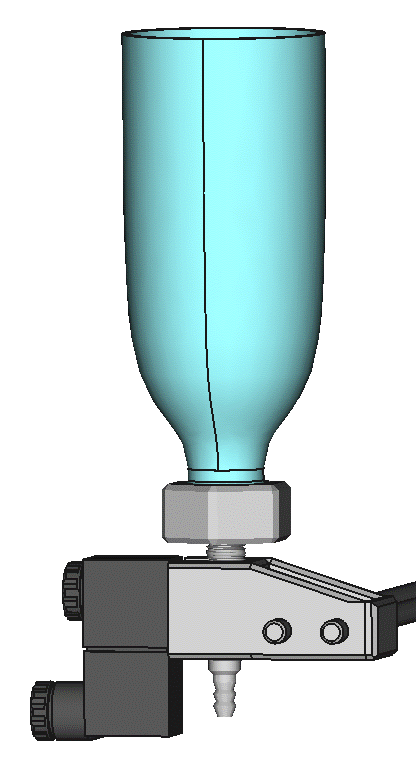
The Solenoid Assembly
Now we can piece together the solenoid, the bracket, the bottle adapter, and the nozzle.
Attaching to a tripod or light stand
Instead of worrying about designing our own stand, we should just use the standard mounting threads so that we can attach to any photography stand or tripod. The standard for most photography equipment is a 1/4-20 bolt.
Why yes, there is an ISO standard for that.
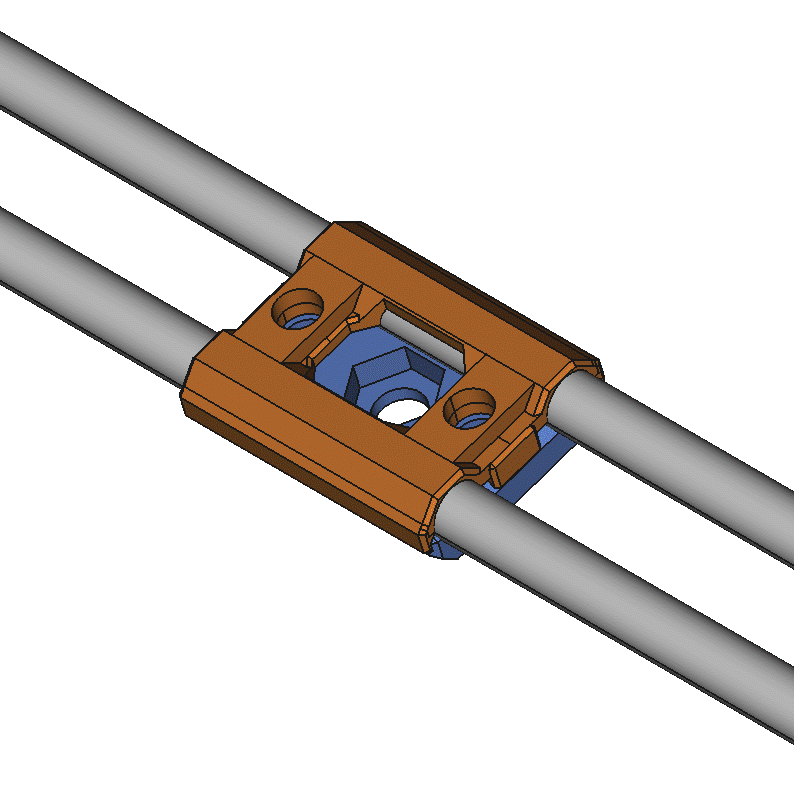
I designed the stand mounting bracket to be two pieces, that clamp over the threaded rods, so that you can release some of the tension and move the solenoid assembly in and out.
The bottom piece has a cut out for a 1/4-20 hex nut, to capture the piece onto the stand’s bolt. There are cutouts for M6 hex bolt heads on the bottom, to be able to use hex nuts to tighten down the clamp.
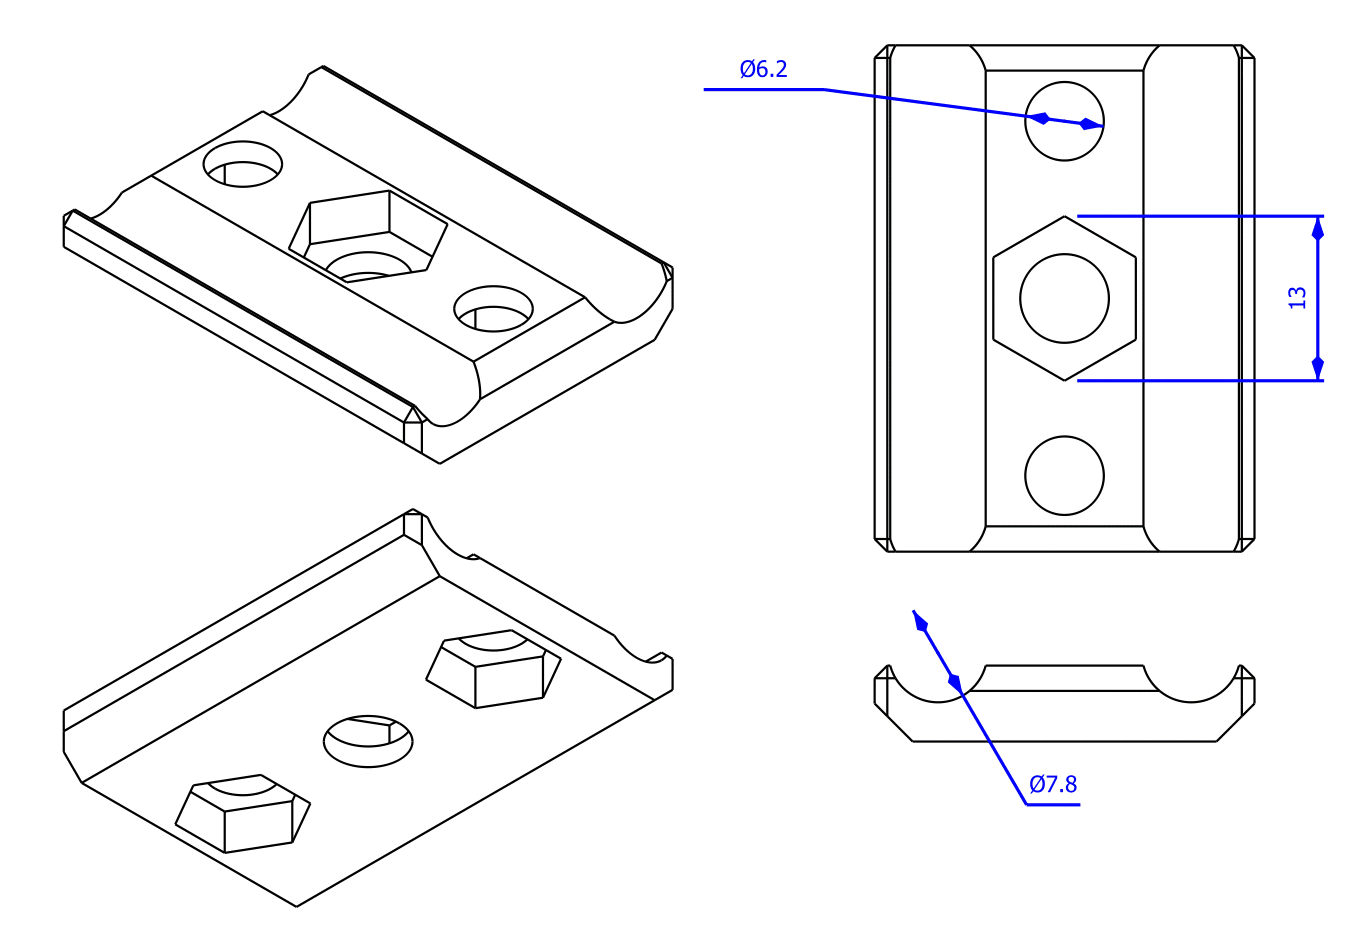
The top piece just has the two M6 holes and flat faces for the hex nuts to press onto. There are also features to align the two pieces together.
Adding some counter weight
In order to avoid too much torque on the stand mounting bracket, a counter weight can be added to the opposite end of the threaded rods.
I might play around with the design of this, possibly adding features to add bolts. A 100% infill on this piece only gets to 260 grams.
Maybe add another 1/4 inch NPT port to attach a filled plastic water bottle to the counter weight, and have it hang upside down?
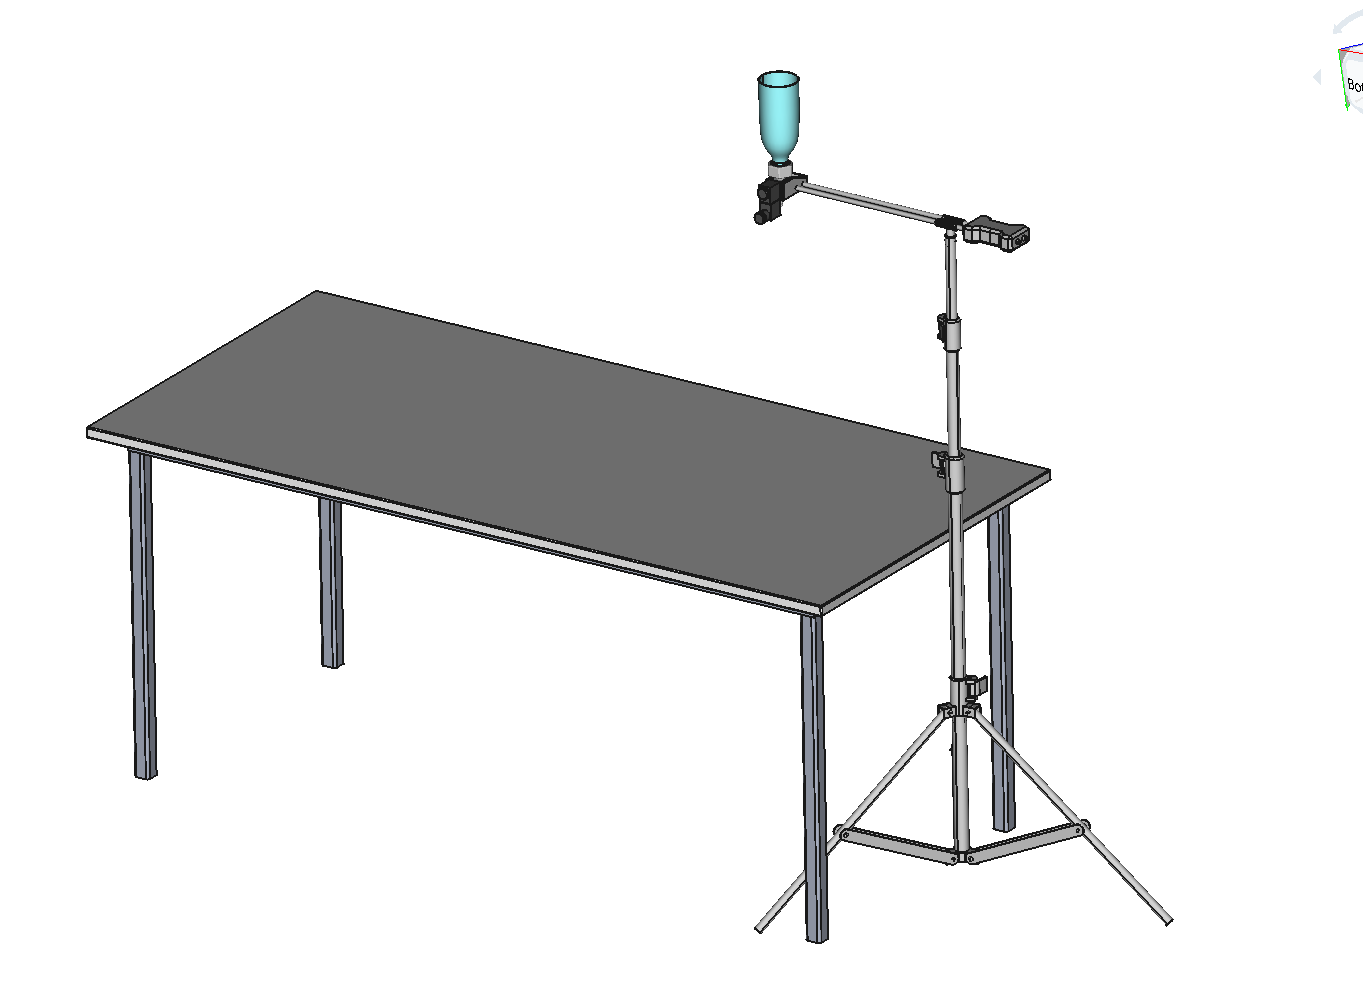
Putting it all together
Here’s a render of the full stand assembly and a desk for reference. It is using a standard photography light stand.