Setting Up Arduino
Want to start writing your own Arduino sketches and upload them to the board?
Just in case you haven’t already, here’s the link to download Arduino.
If you want to use the Arduino IDE to write and upload new firmware to the ESP8266 module, you’ll need to do some setup before Arduino can compile and flash your sketch.
Adding ESP8266 to the Arduino IDE
First up is the ESP8266 Arduino Core. From their github page:
This project brings support for the ESP8266 chip to the Arduino environment. It lets you write sketches, using familiar Arduino functions and libraries, and run them directly on ESP8266, with no external microcontroller required.
You can view the source for this project here.
Adding new Board Manager URL
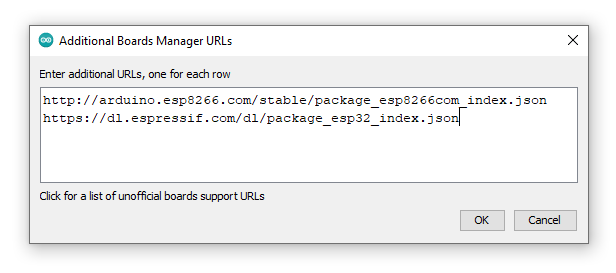
Arduino allows you to add more sources for the board manager to look for extra boards to add. This allows you choose the ESP8266 from the Tools -> Board list. Copy the following URL to your clipboard.
https://arduino.esp8266.com/stable/package_esp8266com_index.json
Open Preferences
Start the Arduino IDE and select File -> Preferences. This will open up the following window:
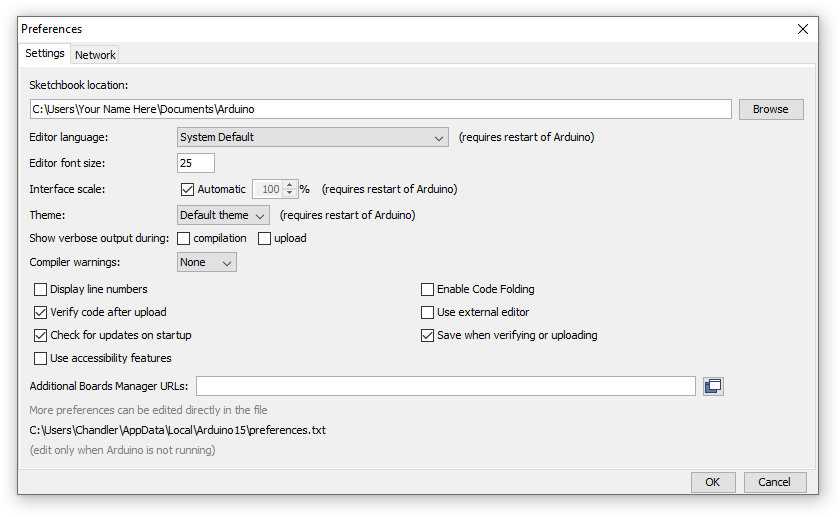
In the text field Additional Board Manager URLs, paste the URL for the ESP8266 package and click OK to confirm the changes.

Install the new board
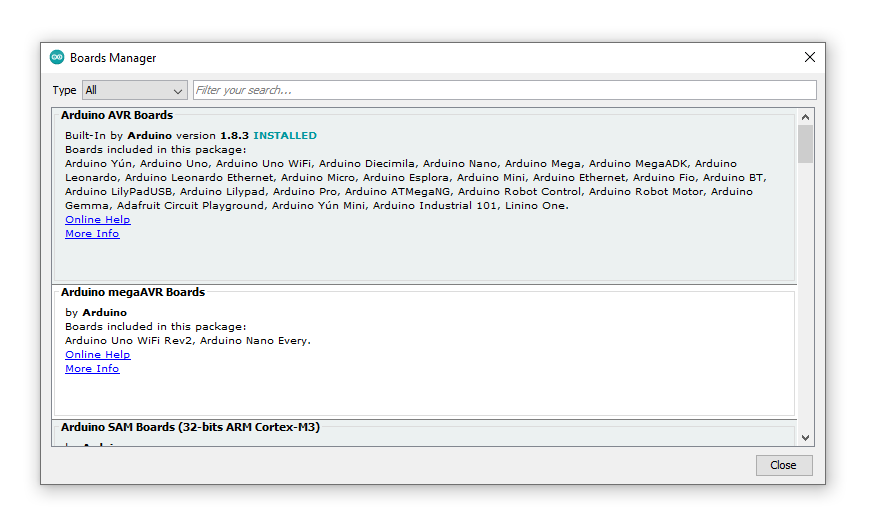
Now that Arduino can find the ESP8266 boards, we need to use the board manager to install the latest version.
Select Tools -> Boards -> Board Manager to display the board manager window.
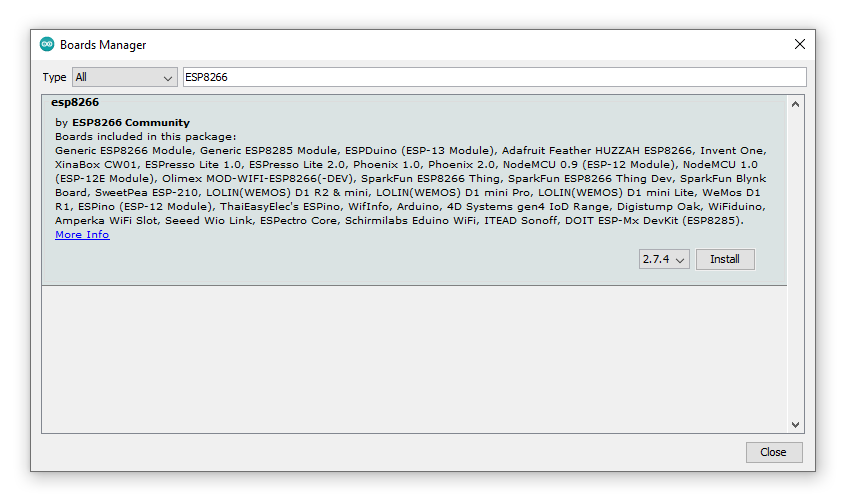
Use the text field to search for ESP8266, or if you’re feeling freaky, scroll down until you find the board. Click Install to grab the latest version of the ESP8266 Arduino Core. This will make it possible to select the ESP8266 module as a board to upload to.
Selecting the ESP8266 Module board
Now that we can select the ESP8266 board under Tools -> Board -> ESP8266 Boards, choose the Generic ESP8266 Module. Here we will need to set some of the upload settings to make sure everthing runs smoothly.
Under the Tools menu, have the following settings selected:
| Setting | Value |
|---|---|
| Board | Generic ESP8266 Module |
| Builtin LED | 2 |
| Upload Speed | 3000000 |
| CPU Frequency | 160 Mhz |
| Crystal Frequency | 26 Mhz |
| Flash Size | 2MB (FS: 1MB OTA:~512KB) |
| Flash Frequency | 26MHz |
| Reset Method | no dtr (aka ck) |
| Debug Port | Disabled |
| IwIP Variant | v2 Lower Memory |
| VTables | Flash |
| Exceptions | Legacy (new can return nullptr) |
| Erease Flash | Only Sketch |
| Espressif FW | nonos-sdk 2.2.1+100 |
| SSL Support | All SSL ciphers |
Now you should be ready to upload a sketch to the board.
Hooking Up
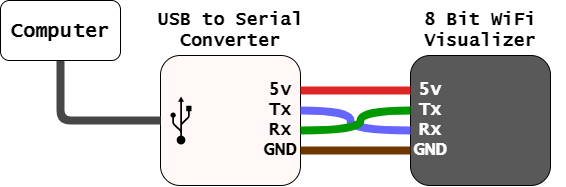
In order to get the sketch over to the board, we need to hook it up to the PC with a USB to Serial converter. These can come in different shapes and sizes, with the most popular being something like the FT232RL boards that are common on Ebay and other sites where inexpensive boards from china are sold.
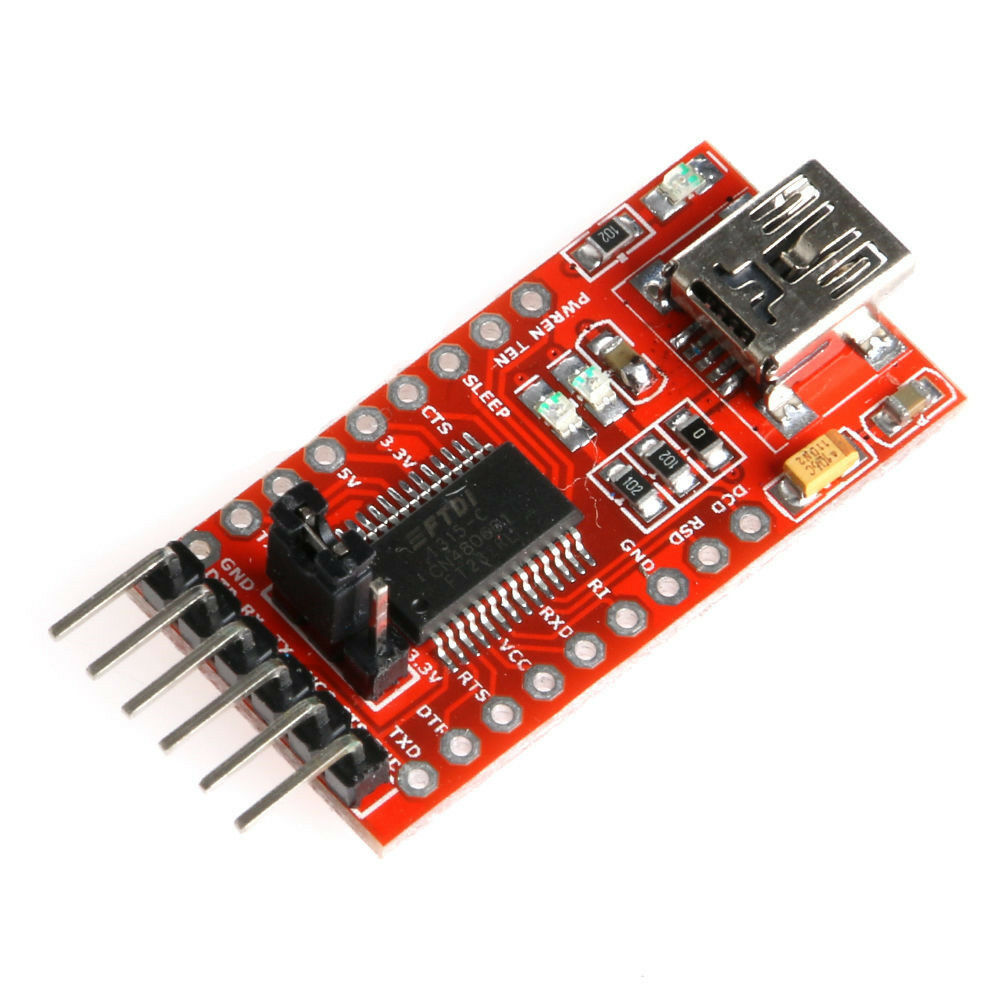
Using the header pins on the board, hook up the UART signals 5V, RX, TX, GND, making sure to cross the communication signals such that the TX from the computer is going to the RX of the ESP8266.
Putting the board into boot Mode
Before we hit upload, we need to make sure that the WiFi module is ready to accept new code. This is done by holding down the BOOT button while cycling the power.
Hold down both the BOOT and the EN buttons, releasing EN first, and then BOOT. This will reset the board into download mode, allowing you to upload a new sketch.
You can verify this is done correctly by using Arduino’s Serial Monitor (Tools -> Serial Monitor) and setting the BAUD rate to 74880. The board will print the following when it is ready to have a new sketch uploaded:
ets Jan 8 2013,rst cause:1, boot mode:(1,6)
Upload
Go ahead and hit Tools -> Upload to upload the new code. The terminal at the bottom of the screen should display some information on how the upload goes.
Here is an example of the terminal output for a successful upload.
Executable segment sizes:
IROM   : 245664          - code in flash         (default or ICACHE_FLASH_ATTR)
IRAM   : 27932   / 32768 - code in IRAM          (ICACHE_RAM_ATTR, ISRs...)
DATA   : 1320  )         - initialized variables (global, static) in RAM/HEAP
RODATA : 1228  ) / 81920 - constants             (global, static) in RAM/HEAP
BSS    : 25544 )         - zeroed variables      (global, static) in RAM/HEAP
Sketch uses 276144 bytes (26%) of program storage space. Maximum is 1044464 bytes.
Global variables use 28092 bytes (34%) of dynamic memory, leaving 53828 bytes for local variables. Maximum is 81920 bytes.
esptool.py v2.8
Serial port COM3
Connecting....
Chip is ESP8266EX
Features: WiFi
Crystal is 26MHz
MAC: d8:bf:c0:03:76:60
Uploading stub...
Running stub...
Stub running...
Changing baud rate to 3000000
Changed.
Configuring flash size...
Auto-detected Flash size: 2MB
Compressed 280304 bytes to 206284...
Wrote 280304 bytes (206284 compressed) at 0x00000000 in 2.2 seconds (effective 1033.3 kbit/s)...
Hash of data verified.

Leaving...
Soft resetting...